Modding Terraria – Part 1 Getting Started
Modding Terraria is a fun way to add and adjust features in a playful way and learn more about programming.
In this part we will start setting up our work environment and create a very basic mod that will add a new sword into our world. Since a major part of Terraria is combat, adding a new weapon is something very fun and exciting to do!
Introduction
A game mod (short for “modification”) is an adjustment by players or fans of a video game. A mod changes one or multiple aspects of said game, such as how it looks or interacts. The term mod covers the whole modification aspect as mods can vary between simple changes to complete game overhauls. Mods have been one of the, if not the, most important factor when it comes to commercial success of games. Let’s take Skyrim and Minecraft as our examples. When looking into these two games you often find the term “vanilla”. Vanilla Skyrim and Vanilla Minecraft, for example. This term refers to the original and unmodified game.
Getting Started
Terraria is a procedurally generated 2D world game that features a huge variety of things to do. You can explore, craft, build, fight various creatures and more.
Before we get into the whole modding Terraria we first need to get some software ready.
Setting up Terraria
First off, you need to own a copy of Terraria which comes together with tModLoader since the 1.14 patch.
The easiest way to obtain a copy of Terraria would be to buy it from the Steam store. Next, you can download the tModLoader application for free here
Next, after getting Terraria and installing it together with tModLoader, open tModLoader. It will look just about the same as the normal Terraria client

In previous version we had to manually enable developer mode. This is not the case anymore. Go to Workshop and click on Develop Mods. On the bottom right it should say something like Create Mod. Click on this button and fill in the fields
| ModName (no spaces) | FirstMod |
| Mod DisplayName | My First Mod |
| Mod Author | (Your name here) |
| BasicSword (no spaces) | TestSword |
After you’ve filled in the fields click on Create. You should see something like the following screen when you’re done.
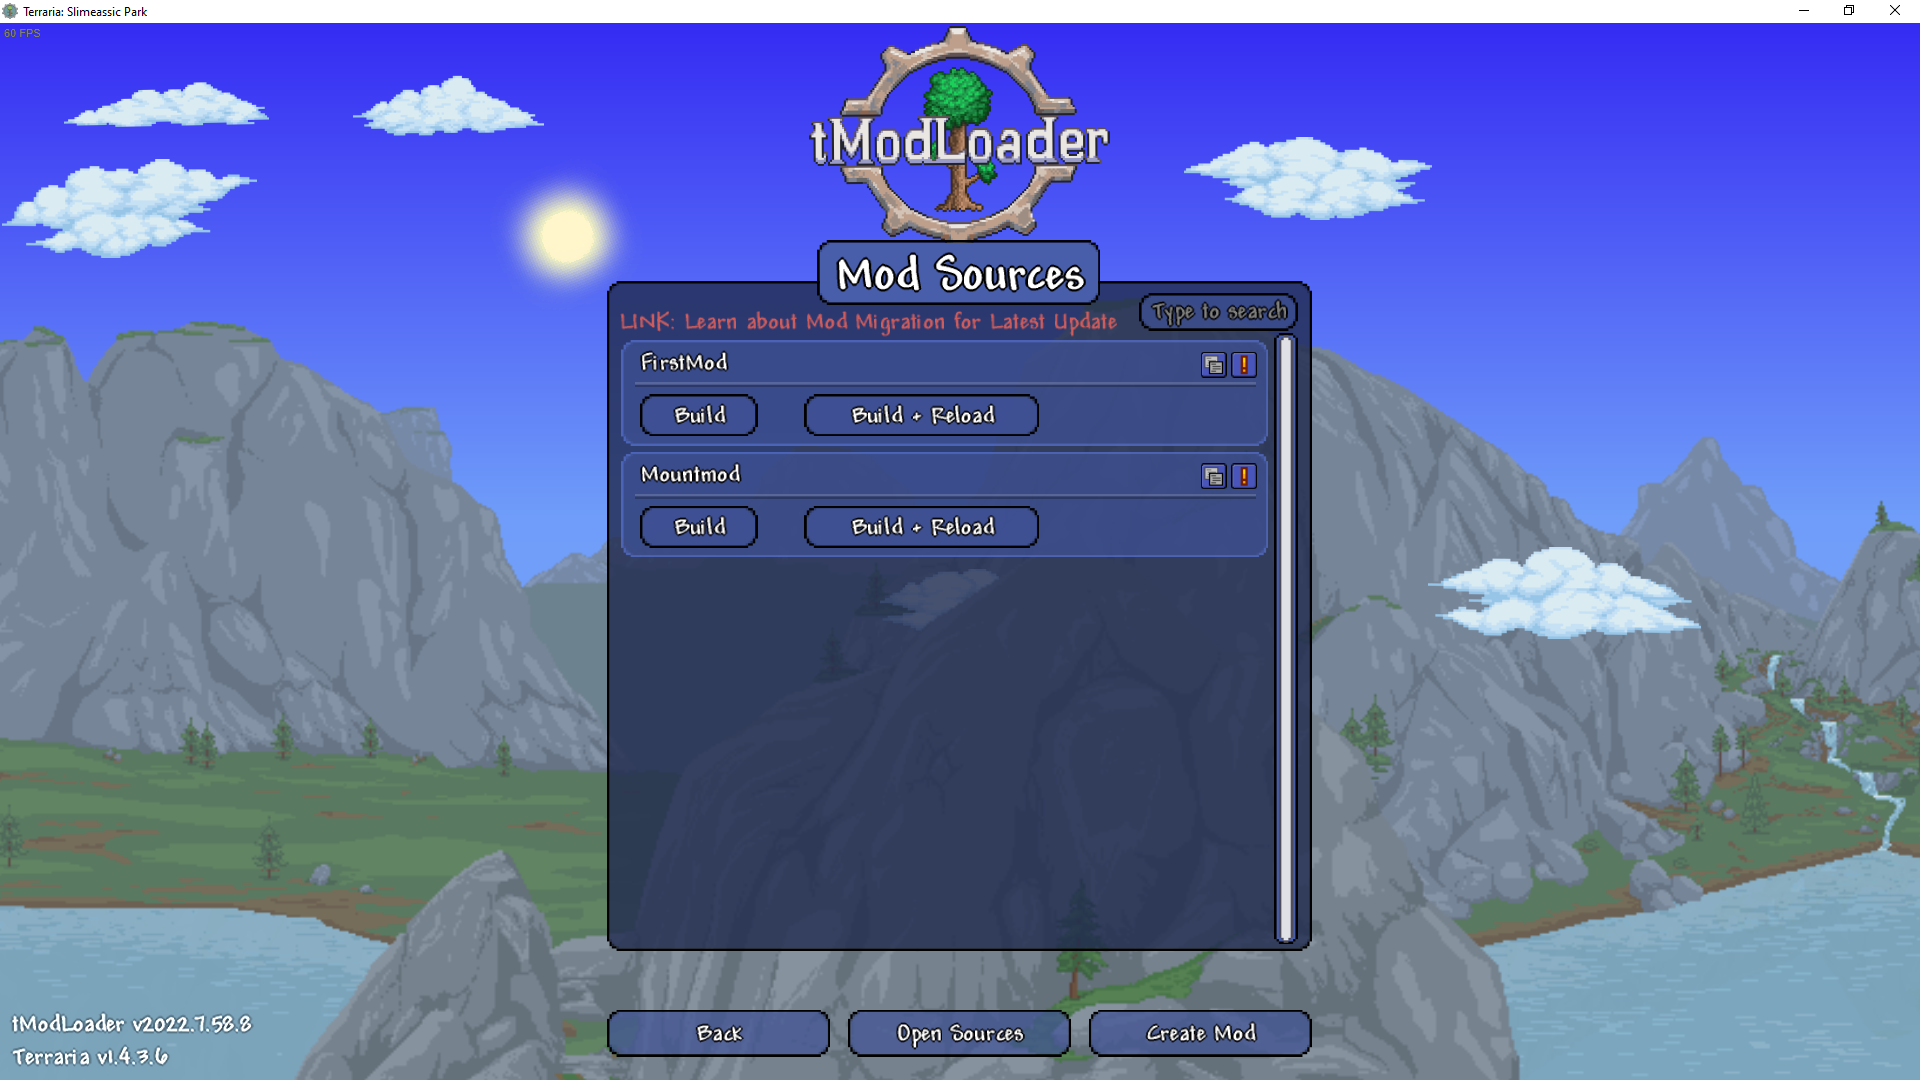
Click on Build + Reload underneath FirstMod to create your first mod. Go back to the workshop and click on Manage Mods. You should see your newly added mod here.

Create a new character and a new world, grab a work bench, collect 10 dirt and you should see something very cool when trying to craft items

Now that we know what our first mod does, let’s try to adjust some numbers.
Setting up Visual Studio
Terraria is a game written in the C# programming language. Therefore, our mods will also be written in that same language. To make our lives easier while creating mods, we will use Visual Studio. Visual Studio is a free to use program for Windows and MacOS that contains built-in IntelliSense and other nifty features.
If you’re following this guide on a Linux machine, please download Visual Studio Code together with the C# plugin. You can find the download link for both below.
- https://code.visualstudio.com
- https://marketplace.visualstudio.com/items?itemName=ms-dotnettools.csharp
After downloading and installing Visual Studio click on File -> Open -> Project/Solution.... Navigate to and select the following directory on Windows to be opened:
C:\Users\Your User\Documents\My Games\Terraria\tModLoader\ModSources\FirstMod
On Linux, this directory should be located at
~/.local/share/Terraria/tModLoader/ModSources/FirstMod
OR
$XDG_DATA_HOME/Terraria/tModLoader/ModSources/FirstMod
For MacOS, you should be able to find this directory at
/Users/account/Library/Application Support/Terraria/tModLoader/ModSources/FirstMod
In previous versions, the location was in the following directory for Windows, Linux and MacOS respectively, so keep this change in mind!
[Windows] C:\Users\Your User\Documents\My Games\Terraria\ModLoader\Mod Sources\FirstMod
[Linux] ~/.local/share/Terraria/ModLoader/ModSources/FirstMod
[MacOS] /Users/account/Library/Application Support/Terraria/ModLoader/Mod Sources/FirstMod
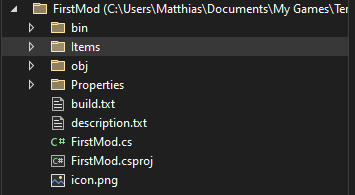
In your solution explorer you should see the following
Adjusting our test sword
Let’s open up the Items directory. Inside we find a C# script called TestSword.cs and the image that belongs to our weapon.
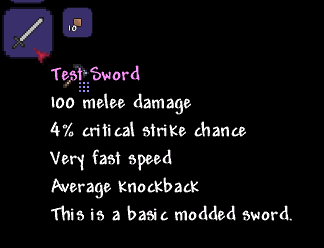
If we open TestSword.cs we can see all its values, e.g. the damage it deals, whether the weapon is ranged based or melee based and the recipe to craft our weapon.
Let’s play a bit with a couple values, find the line that says Item.damage = 50; and change that to Item.damage = 100;. Next, find the line that says Item.rare = ItemRarityID.Blue; and change that to item.rare = ItemRarityID.Pink;. Save the file and open tModLoader again.
Inside tModLoader, go to Workshop and then to Develop Mods and Build + Reload your mod again.
Start your world again and try to craft your Test Sword.
You’ve created your own first mod for Terraria!
This part was about getting used to the tools required in order to start modding Terraria.
In the next part, we will go through some basics of programming, create another custom item, give it a custom image and change some properties of specific enemies.


Joseph Bloe
17th September 2022Visual Studio != VSCode (compare visualstudio.com to code.visualstudio.com).
“Navigate to C:\Users\Your User\Documents\My
Games\Terraria\tModLoader\ModSources\FirstMod” only applies to ONE of the THREE OSes you listed.
Matthias
17th September 2022Thanks for notifying us about this.
We’ve updated the post accordingly!
Anonymous
15th August 2023“If you’re following this guide on a Linux machine please download Visual Studio together with the C# plugin.”
It should say “Visual Studio Code” since Visual Studio isn’t available on Linux.
Matthias
15th August 2023Thanks for bringing this to our attention. It was indeed supposed to say Visual Studio Code. We’ve updated the post accordingly and added links where necessary.